
Pandas is one of the most popular open-source frameworks available for Python. It is among the fastest and most easy-to-use libraries for data analysis and manipulation. Let us learn how to install Pandas in both Windows and Linux systems.
Pandas dataframes are some of the most useful data structures available in any library. It has uses in every data-intensive field, including but not limited to scientific computing, data science, and machine learning.
The library does not come included with a regular install of Python. To use it, you must install the Pandas framework separately.
In this tutorial, we’ve covered the easiest methods to install Pandas on Windows and Linux machines.
What is Pandas Library in Python
Pandas is a data analysis and manipulation library in Python. It gives you data structures and functions that are required to work with structured data. These are some of the key features of Pandas:
- Time series: Gives you data range generation and frequency conversion
- Data cleanup: Has in-built tools to load data from various file formats and handle missing data.
- Data alignment: Automates data alignment.
Install Python before Installing Pandas
The common pitfall people face is that they somehow fail to check if they have Python installed on their device. Follow the instructions listed in this article to install Python. If you have Python installed already, ensure it is updated to the latest version.
How to Install Python Pandas on Windows and Linux?
Before you install Pandas, you must bear in mind that it supports only Python versions 3.7, 3.8, and 3.9. Therefore, if you have not installed Python on your computer or have an older version of Python installed, you must install a version that supports Pandas on your computer.
To install Python without any hassle, make sure you follow our Python installation guide.
Installing Pandas on Windows
There are two ways of installing Pandas on Windows.
Method #1: Installing with pip
It is a package installation manager that makes installing Python libraries and frameworks straightforward.
As long as you have a newer version of Python installed (> Python 3.4), pip will be installed on your computer along with Python by default.
However, if you’re using an older version of Python, you will need to install pip on your computer before installing Pandas. The easiest way to do this is to upgrade to the latest version of Python available on https://www.python.org.
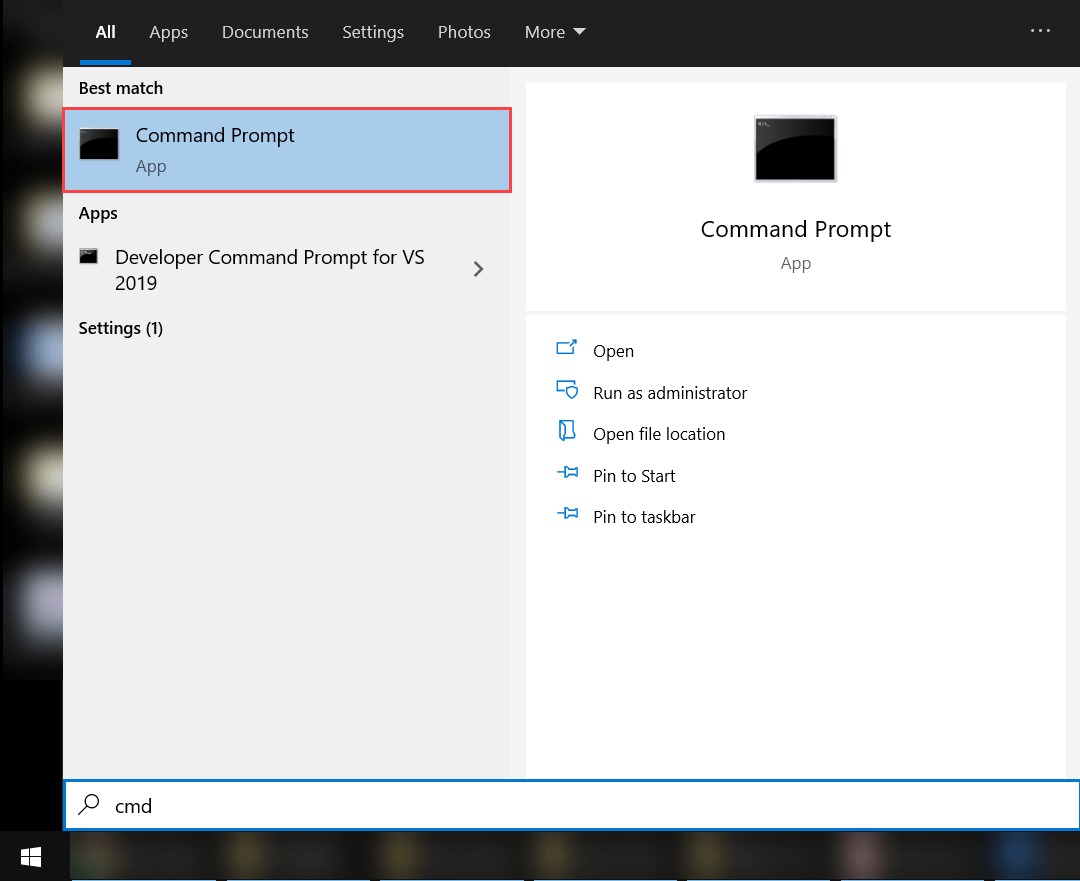
Step #1: Launch Command Prompt
Press the Windows key on your keyboard or click on the Start button to open the start menu. Type “cmd,” and the Command Prompt app should appear as a listing in the start menu.
Open up the command prompt so you can install Pandas.
Step #2: Enter the Required Command
After you launch the command prompt, the next step in the process is to type in the required command to initialize pip installation.
Enter the command “pip install pandas” on the terminal. This should launch the pip installer. The required files will be downloaded, and Pandas will be ready to run on your computer.
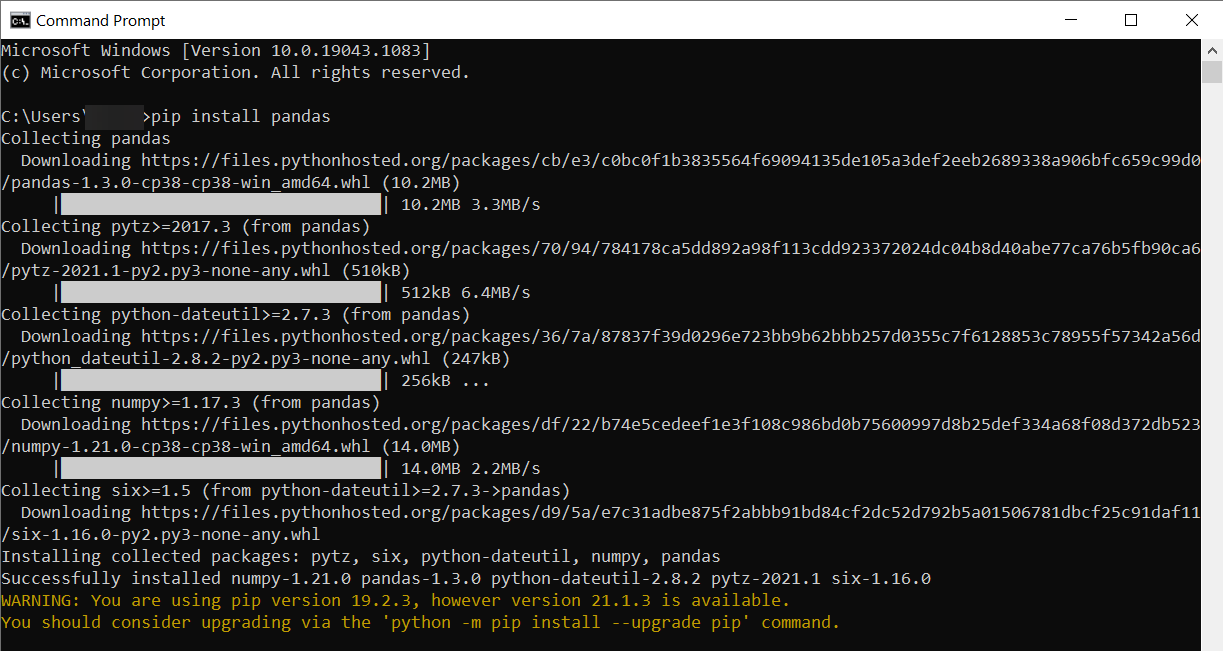
After the installation is complete, you will be able to use Pandas in your Python programs.
Method #2: Installing with Anaconda
If you don’t have much experience using terminals and programming, installing Pandas using Anaconda is the best way to go. Anaconda is a powerful Python distribution that gives you access to a variety of tools besides Pandas. As you learn more and more about Python, you will find Anaconda more and more useful.
Step #1: Download Anaconda
To install Anaconda, you must first visit https://www.anaconda.com/products/individual and click on the “Download” button on the right.
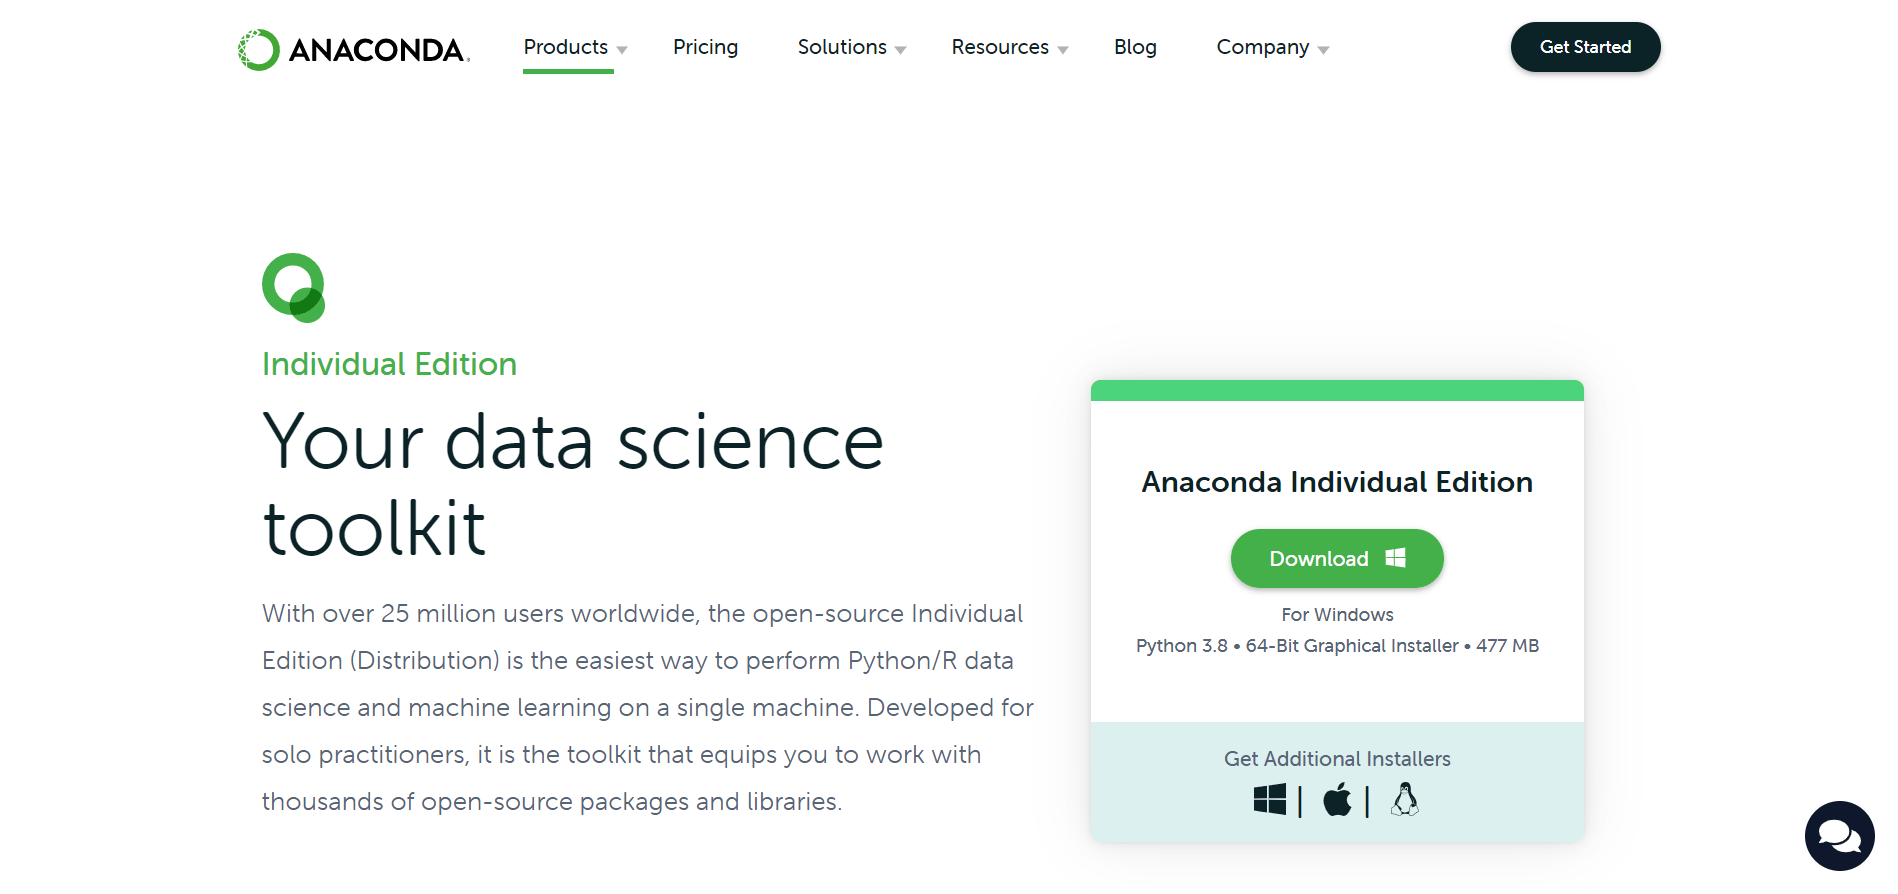
The appropriate file for the version of Python installed on your Windows system will begin to download.
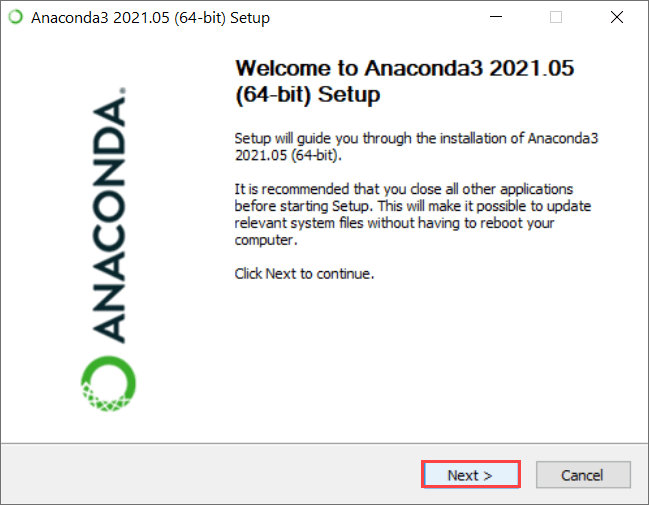
Step #2: Install Anaconda
Launch the installer that you downloaded from the website, and click the “Next” button.
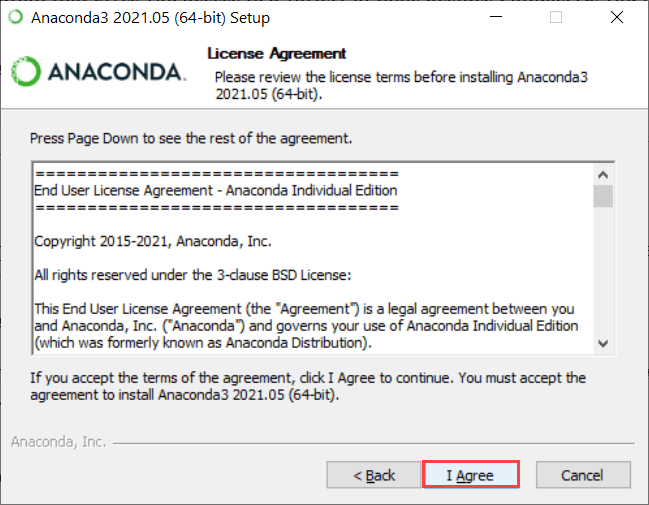
Next, to agree to the license agreement, press the “I Agree” button.
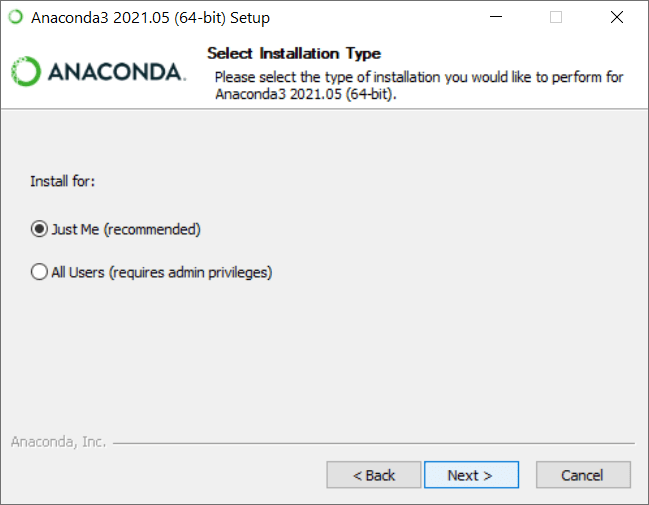
You must then select the user accounts for which you want Pandas installed. For the sake of the tutorial, we chose the recommended “Just Me” option.
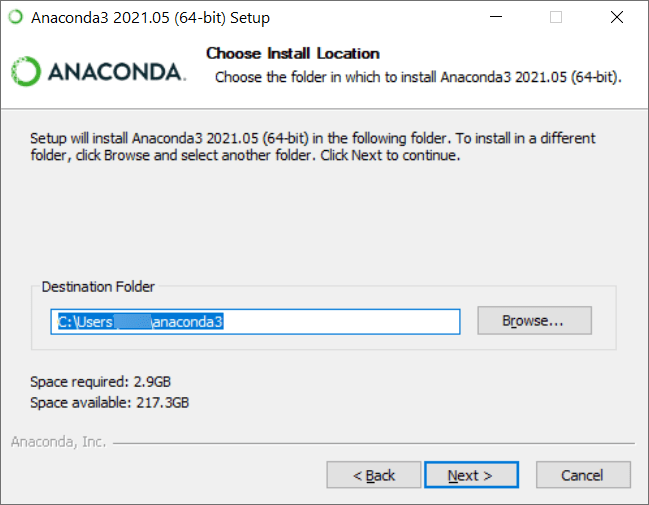
In the penultimate step of the wizard, you must select where you want the distribution to be installed.
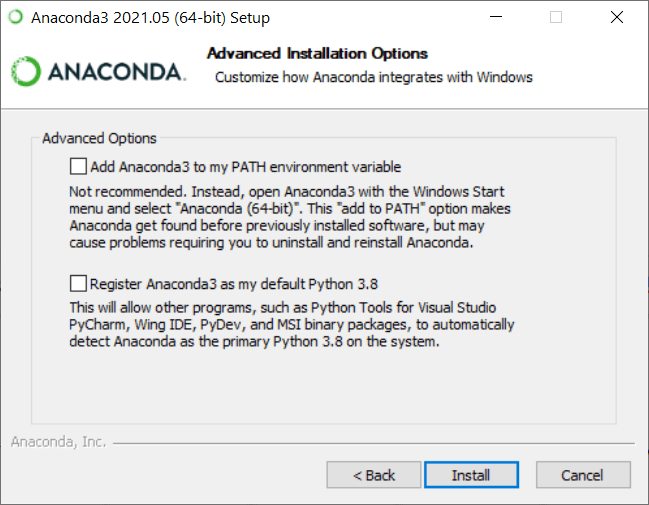
Finally, you must check the “Add Anaconda to my PATH environment variable” and “Register Anaconda3 as my default Python 3.8” options in the advanced installation options section.
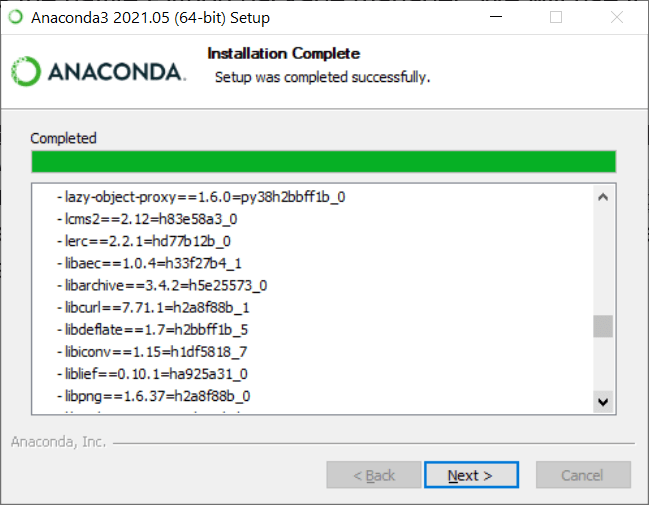
Clicking the “Install” button will begin the installation process for Anaconda. After a few minutes, when the installation is complete, you will see the “Installation Complete” screen. It looks like this:
You will now have access to all of the Pandas libraries on your computer. This is because Anaconda installs all of the major libraries for you automatically during installation.
Step #3: Use Jupyter Notebook (Optional)
If you’re going to be using Pandas, chances are, you’re working on machine learning projects. Jupyter Notebooks are a nifty IDE that makes working on machine learning projects more straightforward.
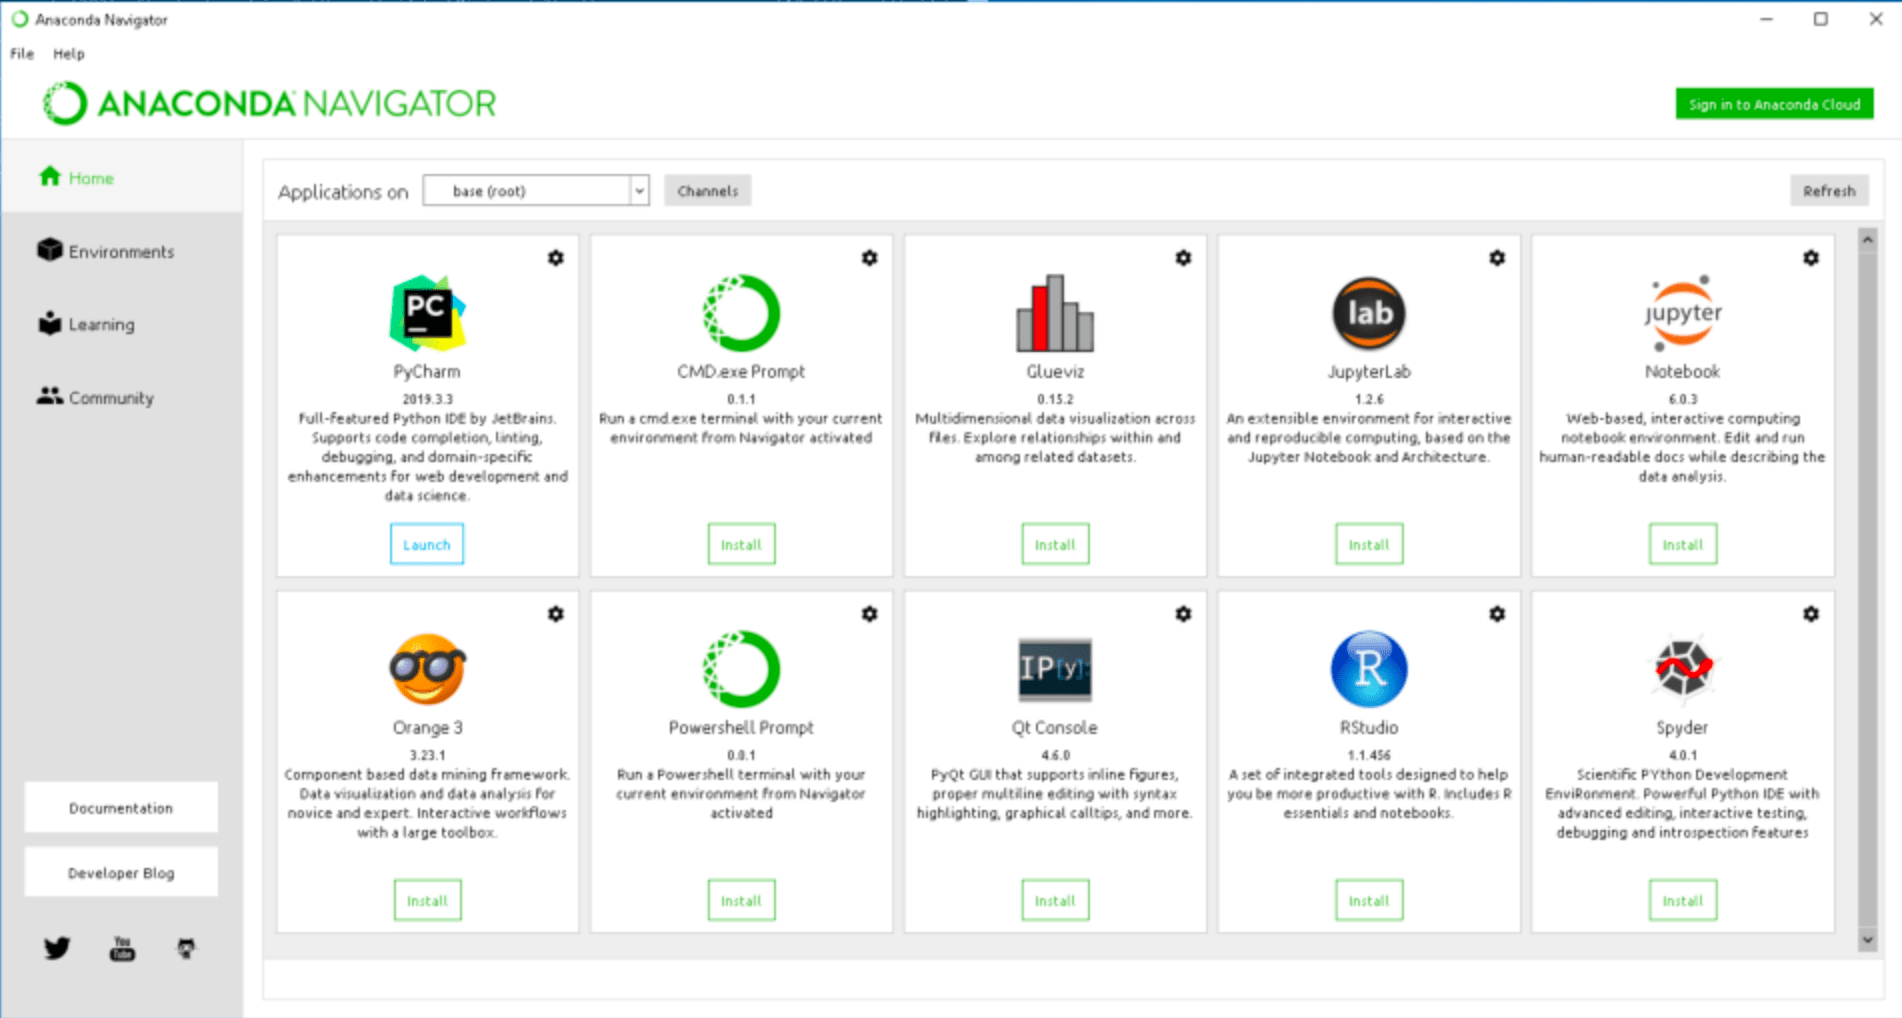
To work with Jupyter Notebooks after installing Anaconda, press the Windows key and search for “Anaconda Navigator.” A screen will appear with several applications listed.
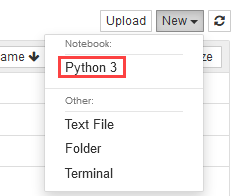
From the list, you must find and launch Jupyter Notebooks. Your default browser will open a localhost page similar to the one in the image below. You will find a dropdown menu on the right side of the screen, just as indicated.
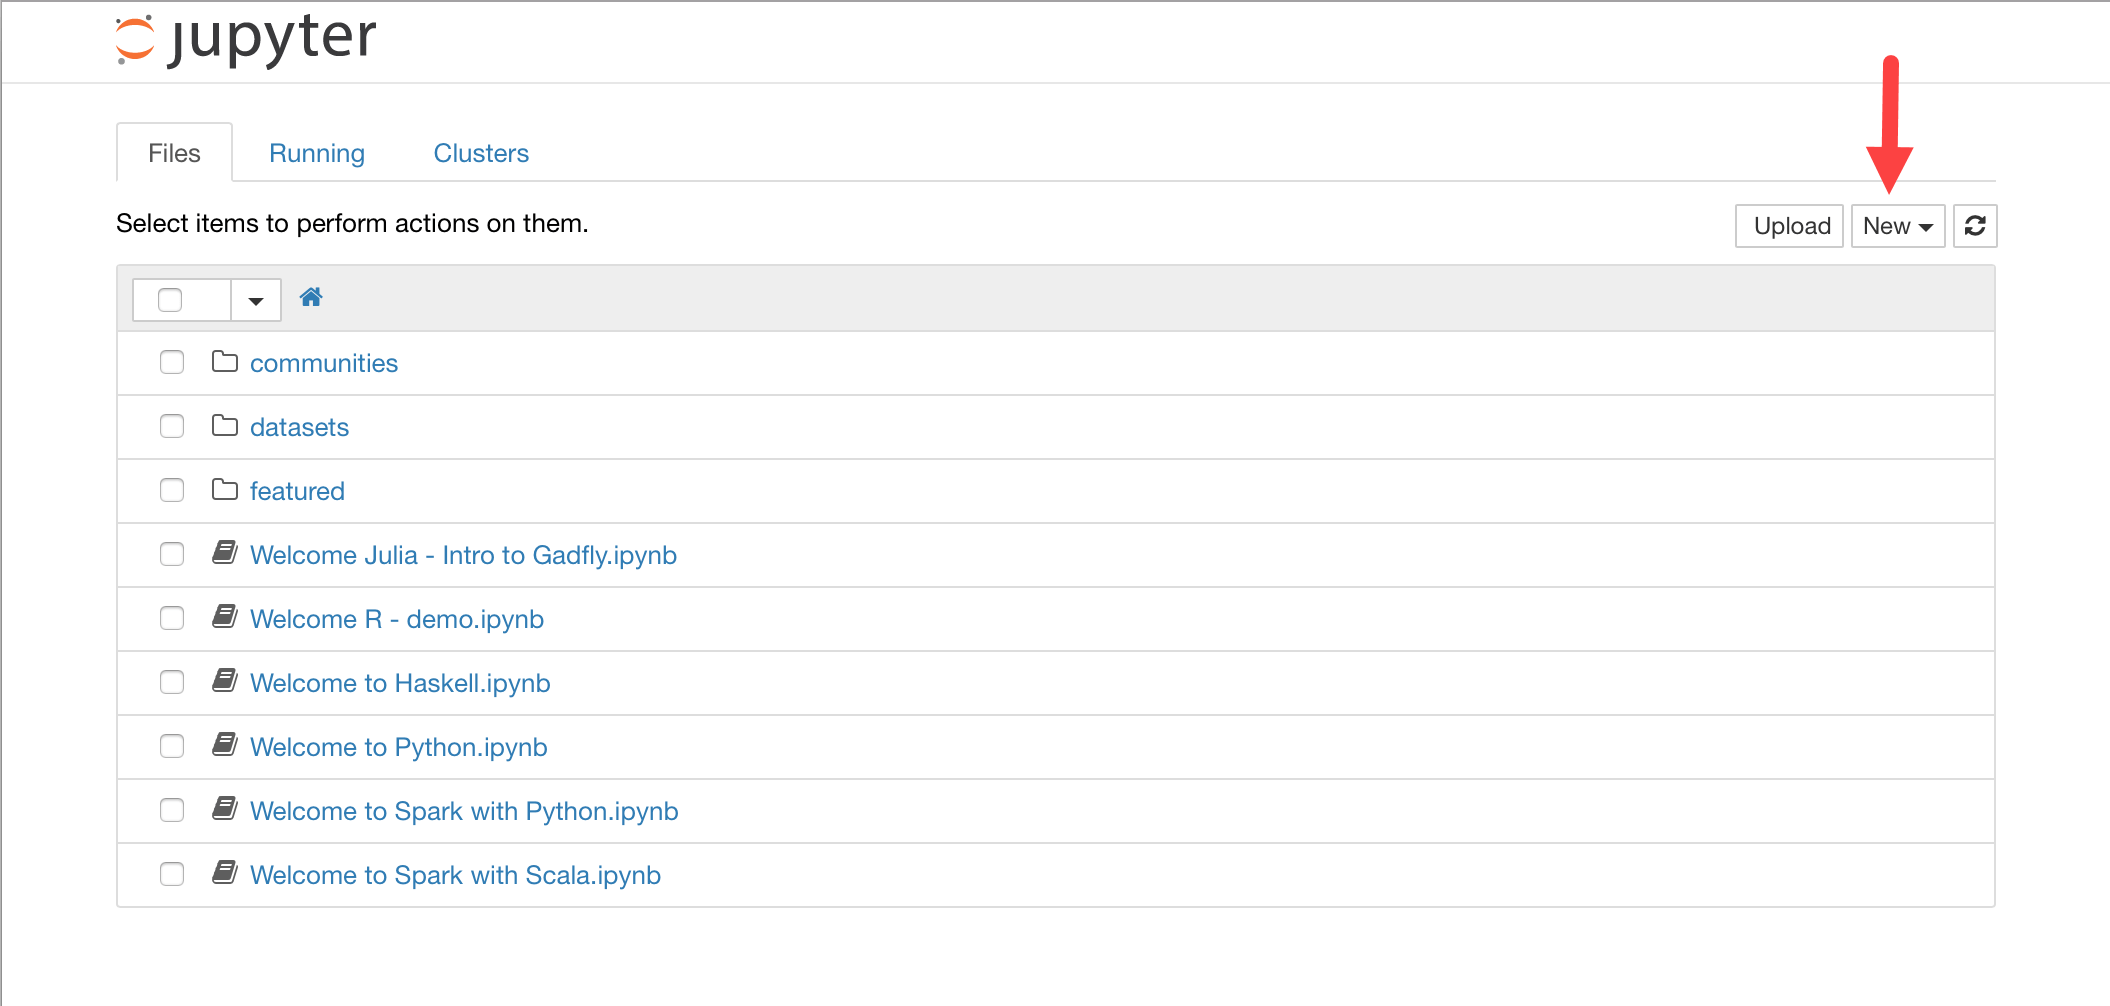
You must open the dropdown menu and select the “Python 3” option. Then, a new tab will open up where you can start coding.
Installing Pandas on Linux
There are three ways to install pandas on a Linux distro. You can either (1) install it from the distro’s repository, (2) install it using pip, or (3) use Anaconda or Miniconda to install it.
Installing pandas from the distro’s repository is an unreliable method of installation since the repo often has an older version of pandas. Installing pandas with Anaconda or Miniconda will require you to set it up, extending the process.
Installing Pandas using pip is the best way to go since it installs the latest version and doesn’t require going through several steps to set up another prerequisite tool.
Method #1: Installing with pip
Python users of all skill levels use one of two Python package managers. One is called pip, and it is the official Python package manager. The other package manager is known as conda. Conda may represent either Anaconda or Miniconda, depending on what the user has installed on their computer.
To install Pandas with pip:
Step #1: Install pip
Installing pip3 on your Linux machine is as simple as running the following command on your terminal:
| sudo apt install python3-pip |
You must bear in mind that since pip needs Python 3 to run, Python 3 will be installed on your Linux machine. When you run the command, you should see an output similar to this:
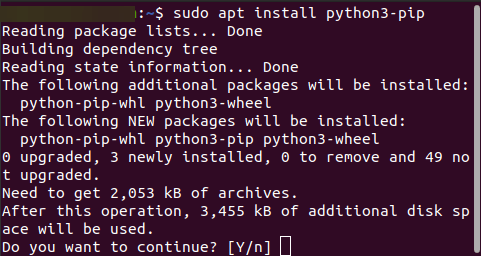
As you can see, the command will also install python-pip-whl and python3-wheel. “Wheel” is a built-in Python package format.
You will need to press the “Y” button to initiate the installation. Then, when the process completes, you can move on to the next step.
Step #2: Install Pandas
Now that your machine has pip installed, you can install Pandas with it. All you have to do is run the following command:
| pip3 install pandas |
When the command finishes running, Pandas will be installed on your machine.
Method #2: Installing with Anaconda
If Anaconda is installed on your machine already, you can skip straight to step #2.
Step #1: Installing Anaconda
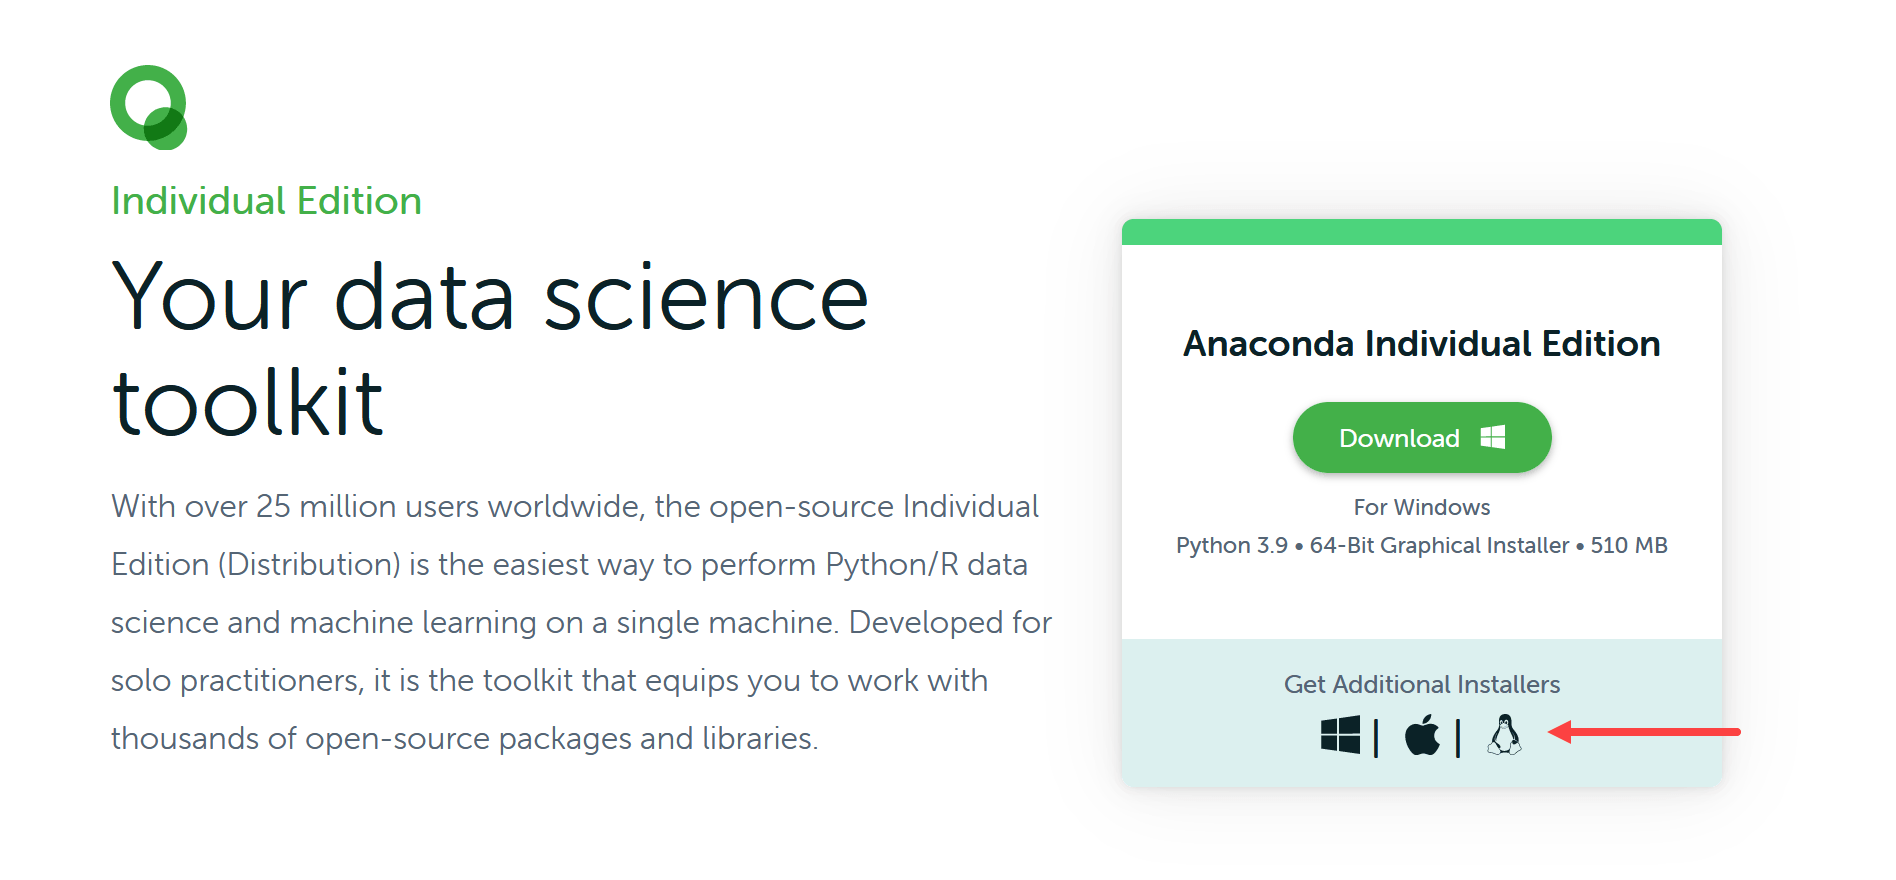
To install Anaconda, you must first download the required installer. To do this, visit https://www.anaconda.com/products/individual, and scroll down a bit. You will see a “Get Additional Installers” section off to the right of the page. Click on the Linux icon.
The page will scroll you down to the “Anaconda Installers” section. Find the installer appropriate for your Linux machine, and then right-click on it. Next, choose the “Copy link address” option.
Now that you have the link to the bash installer with the .sh extension copied on your clipboard, you must use wget to download the script.
Open your terminal and use the cd command to navigate your home directory. Next, create a directory called “tmp.” Navigate into the tmp folder and use the wget command to download the installer in it.
The script is large, and you will need to wait for a bit for it to finish downloading.
When the script is downloaded, you must run the script to install Anaconda3 on your machine. Before running any commands, ensure you’re in the tmp directory. Then, run the following command:
| $ bash Anaconda3-5.2.0-Linux-x86_64.sh |
The license agreement will appear, and you must accept it to install Anaconda. You must permit Anaconda to get included in your machine’s PATH variable. When Anaconda is added to your machine’s PATH, Anaconda will be called whenever you type $ python into your terminal.
The PATH variable will not automatically be loaded into your terminal after installing Anaconda. To do this, you must source the .bashrc file. Remember that the file will be in the home directory.
| $ source .bashrc |
If running the python command on the terminal brings up the details of the Anaconda installation, the installation has been successful. You can then exit the Python REPL using the exit() command.
Step #2: Installing Pandas
When you have Anaconda or Miniconda installed on your Linux machine, all you have to do is run the following command to install pandas:
| conda install pandas |
The computer will prompt you to confirm the installation. Next, you should see a “Proceed (y/n)” message pop up on the terminal. When you press “y,” the Pandas installation process will begin.
To verify whether Pandas is installed correctly on your system, run python3 on the terminal, and enter the following code in the interactive shell:
import pandas as pd
s = pd.Series([1, 6, 8, 10])
s
You should see the details of the Pandas installation appear in the terminal.
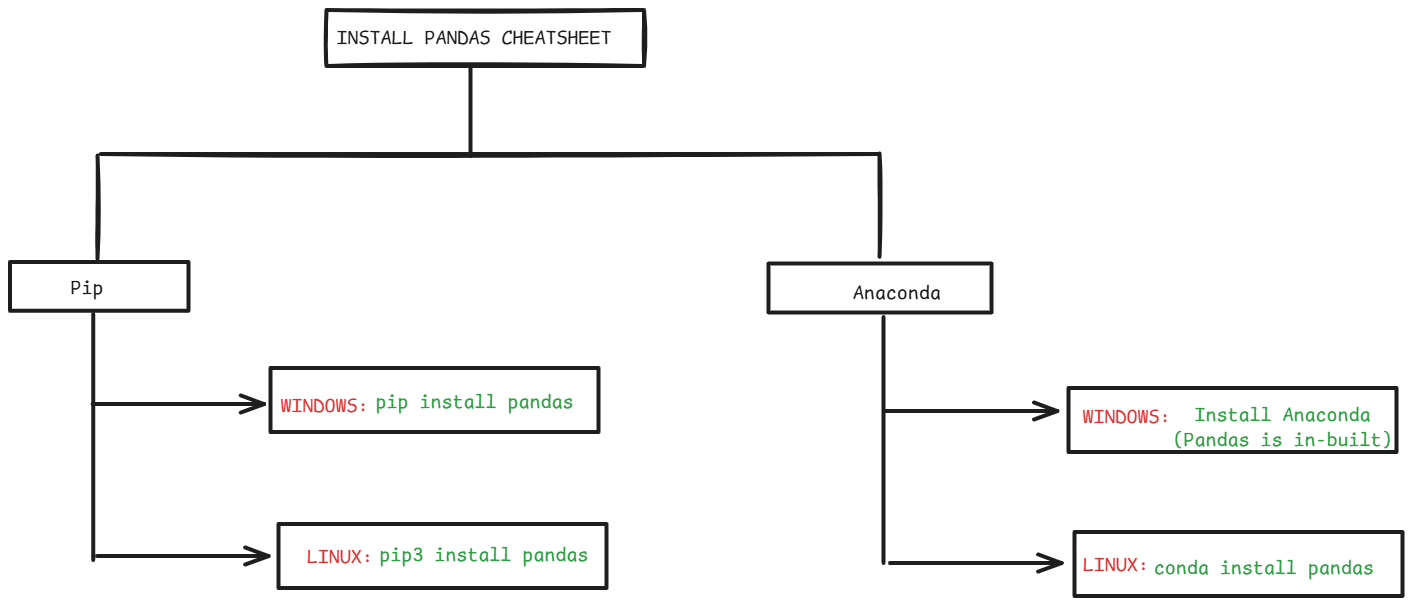
Seems Overwhelming? Here is a Shortened Version
There are two methods to install Pandas
- Pip
- Anaconda
If you prefer Pip:
- Windows: pip install pandas
- Linux: pip3 install pandas
If you like Anaconda:
- Windows: Install Anaconda.Pandas is in-built
- Linux: conda install pandas
How to Clone the Pandas Library
Here are the step-by-step instructions to clone the Pandas library easily.
- Install Git.
- Open Terminal or Command Prompt on your system.
- Execute the following command to close the Pandas GitHub repository:
git clone https://github.com/pandas-dev/pandas.git
- Switch to the cloned directory by executing the command:
cd pandas
Now you are all set.
How to Check the Version of Pandas
Using Python script, you can check the version of Pandas by executing the command in Python Shell:
import pandas as pd
print(pd.__version__)
If you prefer the Command Line, open terminal or command prompt and execute the command:
python -c "import pandas as pd; print(pd.__version__)"
Conclusion
Pandas is one of many nifty libraries that are widely used by Python developers globally. To learn about other libraries and understand how to use them, visit our Python Library Tutorials page.
There are several ways of going about installing Pandas on a computer. The methods listed in this post are fairly simple, and it shouldn’t take you longer than five minutes to get Pandas set up on your machine.